


|
An Innovative Solution to Administer General Assistance |
|
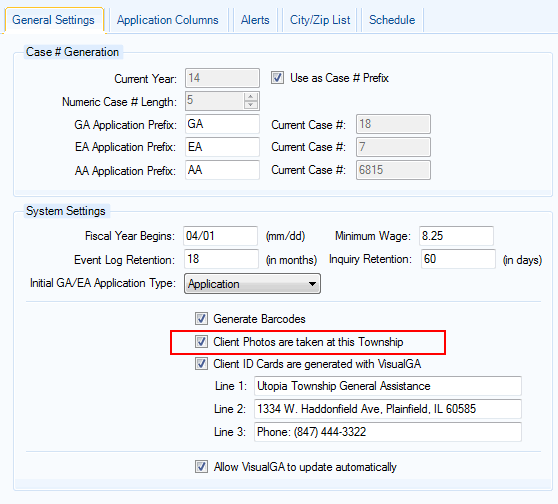
Client Photos You can upload a jpg image to use as a client photo for VisualGA. This will allow you to confirm the identity of a client for future visits. To enable Client Photos you will need to turn this option on in the Administration Console as shown below:
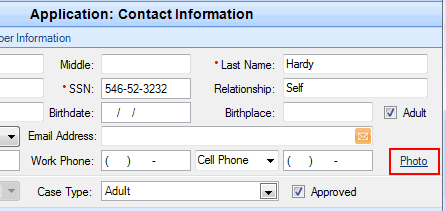
Once that is complete you can now assign a Client Photo for each client by clicking the "Photo" link within the Contact Information screen. If the client already has a photo assigned, you will see a camera icon just to the left of the Photo link.
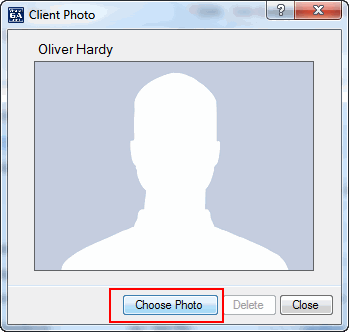
This will bring up the Client Photo (if assigned) or a generic image. You can upload your jpg file by clicking the "Choose Photo" button:
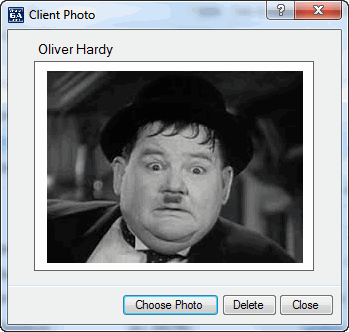
Navigate to the location of the desired file, and choose "Open" in the Windows file dialog prompt. This file must be a jpg image, and can be anything from a digital photo to a scanned drivers license. Once you have selected the appropriate file, you will have then assigned the photo for that client. If the photo was assigned to a client with a SSN, that photo will always remain with the client, no matter what future applications you might add.
|
© 2005-2025 VisualGA.Net. All rights reserved.
Designed and Maintained by NJS Enterprises, Inc.