


|
An Innovative Solution to Administer General Assistance |
|
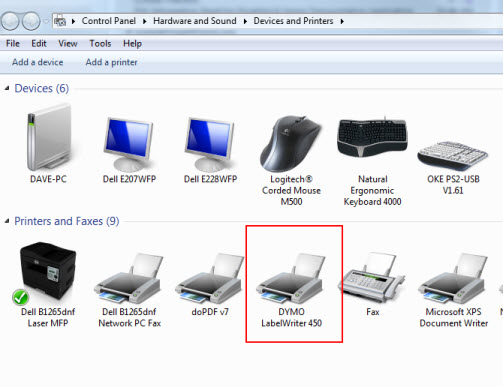
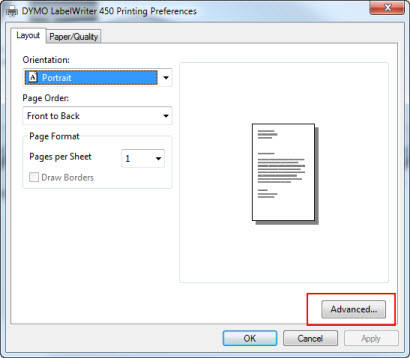
Client ID Card Printer Setup 1) After you receive your DYMO LabelWriter 450, plug in the power adapter to the electrical outlet and to the bottom of the printer. Next, plug in the USB cable to your computer and the bottom of the printer. If Windows detects the printer and automatically installs the drivers, you should have a printer under Windows "Devices and Printers" named "DYMO LabelWriter 450" like so:
If you see this printer, skip to step 3. 2) If Windows does not automatically install the print driver for the DYMO Label Writer 450, you will need to install the print driver manually. Start by disconnecting the printer to the computer by unplugging the USB port and then uninstall any 'DYMO' related software. If you are using Windows 10, download the drivers here. If you are using XP/Vista/Win7 32 bit, download the drivers here, otherwise download the drivers here (version 8.7). You can also check the DYMO product page to see if there are any newer drivers listed than the one here. After you have installed the drivers, plug the USB cable into the printer. 3) Once the drivers have been installed, you need to tell the print driver what type of labels you are using. Right click the "DYMO LabelWriter 450" printer and choose "Printing Preferences". You will see a screen like this:
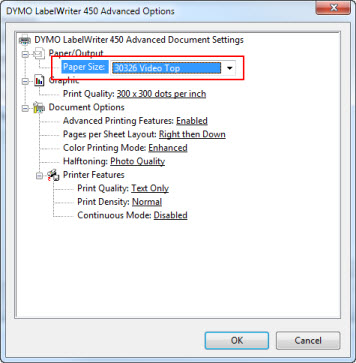
Click the "Advanced" button and under Paper Size, choose "30326 Video Top" like so:
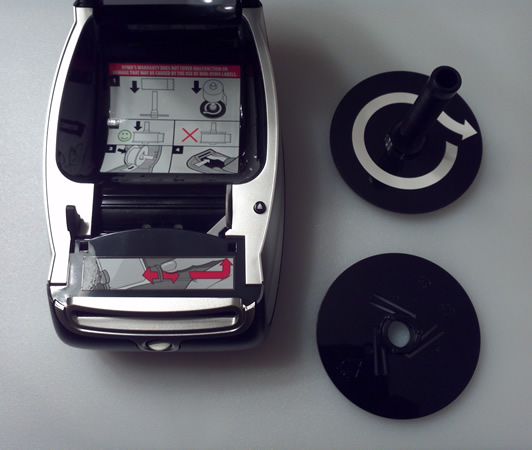
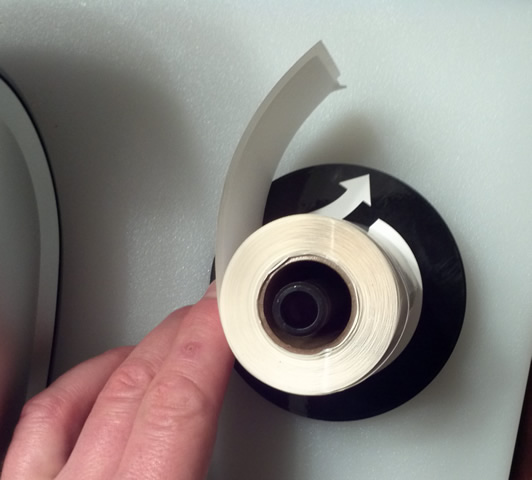
Click OK. You have now configured your DYMO LabelWriter 450 label printer! 4) Unplug your printer from the power source, open the lid, and remove the spool. Pull the solid black cap (not the one with the white arrow) off the spool. If your printer has labels loaded on the spool, remove the labels. When you pull of the black cap, arrange the spool as shown below.
5) Take the 30326 labels and place them over the spool rod so that the labels flow in the direction of the white arrow as shown below.
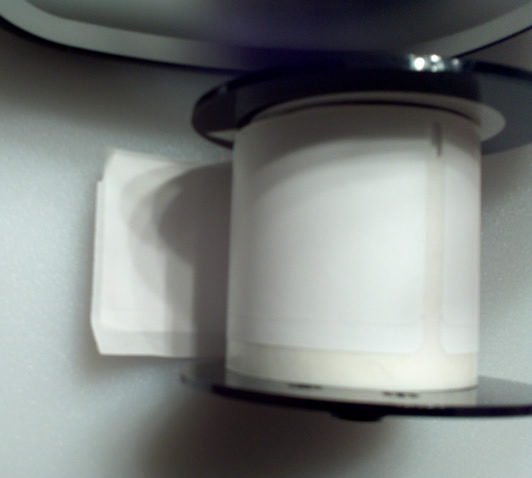
6) Place the black cap removed in Step 4 and reattach it to the spool, aligning as snug as possible to the width of the labels as shown below.
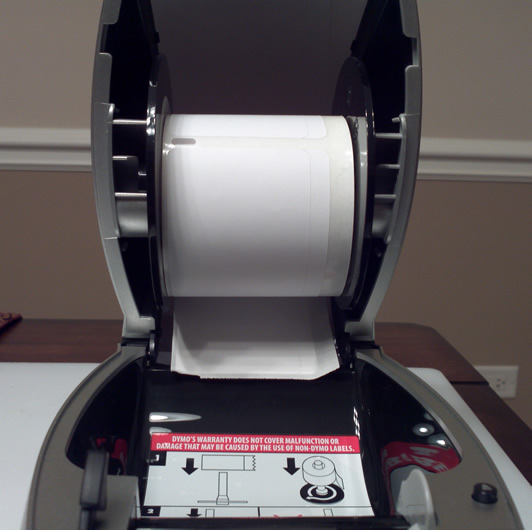
7) Take the spool, and with the labels facing down, insert back into the printer as shown below:
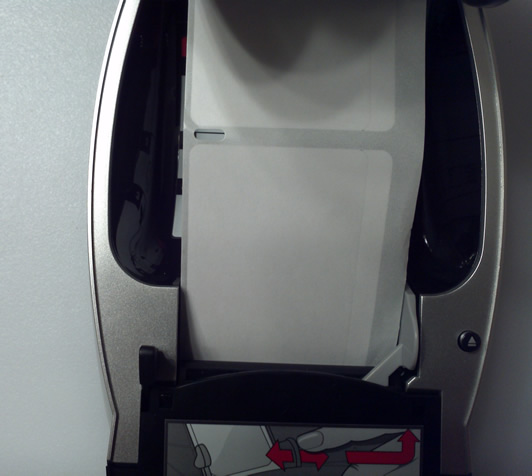
8) Finally, take the labels and pull them into the thermal feeder, which is the black plastic slide with the two white plastic pieces near the center. Align the labels so that they align to the far left of the printer, which is the side with the black release button. You should be able to feed about an inch into the thermal feeder as shown below. The gray guide on the right should be nudged slightly to the left so that edge of the label nearly touches the gray guide. If the label kinks, the gray guide is too far left.
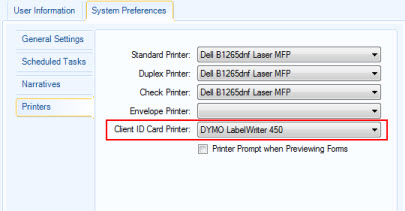
9) Plug the printer back into the power source. It may begin trying to pull the label through but not so much that the label sticks out. If it does not pull at all, try pressing the gray button with the blue light in the front of the printer to start the feeder. If the labels still do not feed, unplug the printer and push the labels in farther. Plug the printer back in and repeat press the gray button with the blue light again. 10) In your VisualGA Profile (Tools & Settings, Edit Profile), go to System Preferences and select the Printers tab and select the "DYMO LabelWriter 450" for your Client ID Card Printer.
Notes Supplies 1) The DYMO LabelWriter 450 can be ordered here. You may want to shop around a bit as costs and inventory may vary. We are not responsible for support for the above listed products, so if you need assistance with set up or maintenance, please contact your IT consultant. |
© 2005-2025 VisualGA.Net. All rights reserved.
Designed and Maintained by NJS Enterprises, Inc.